Ever wondered how people manage to run Private Servers? Well wonder no more! Today, I'll be showing you how to run your own Private Server, based of the "Deltascape Server" !
Step1: INSTALLING JAVA (REQUIRED)
First and foremost, you will need to download JDK. JDK stands for "Java Development Kit", developed by Oracle, and is a must for all Private Servers. JDK, in this case, will be running your server, compiling (Which I will explain later) and running your client.
You can download the latest JDK
by clicking here.
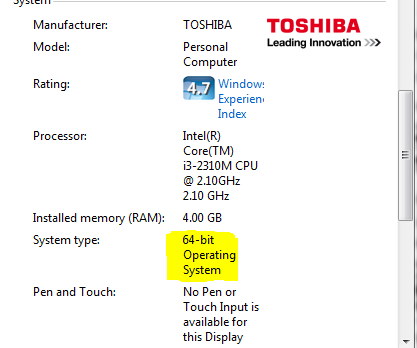
To find out what version you want to download, go to "start", then rick click "computer" then scroll down and click "Properties" from the drop down menu. I'll be getting the "Windows 64bit" version:
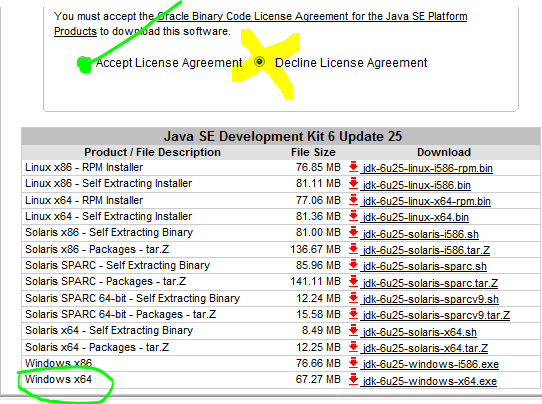
Double click the version you want, and make sure you have "Accept" checked. Once your file has downloaded, click "Run". Then, click next, and your JDK will now install.

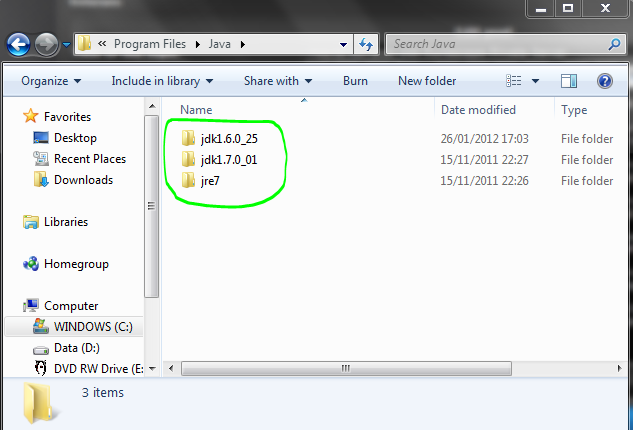
To check that JDK has installed, head to C:/ProgramFiles/Java and you should see three folders labelled: Jdk1.6.0_25, Jdk1.7.0_0.1 and Jre7 - If so, congratulations, you have succesfully installed Java!
 Step2: INSTALLING WINRAR (REQUIRED)
Winrar is a great piece of software, used to compress large amounts of files in to one small, easily managable file. Once again, when downloading Winrar, you need to check what type suits you (e.g. Windows x32) - see above steps if you are unsure.
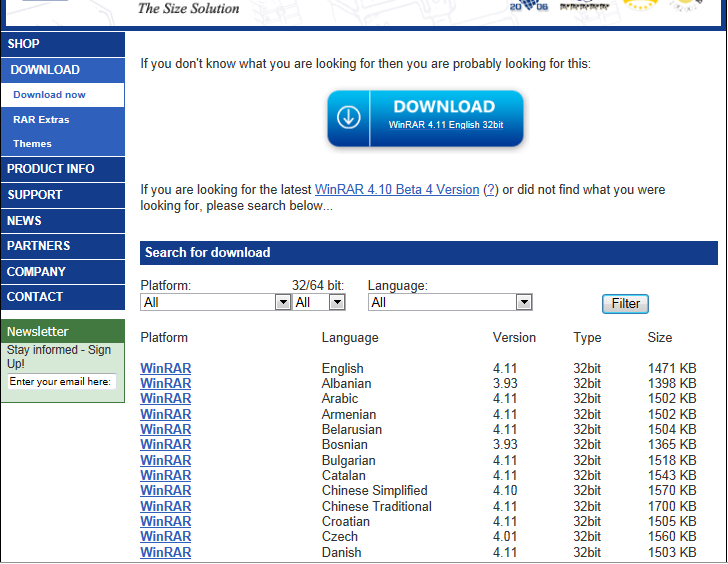
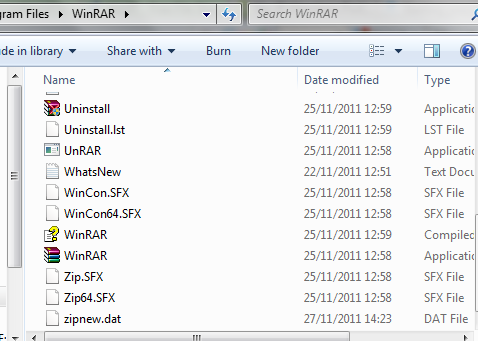
To install, double click the download you want, and then click "run" and then follow the steps for installation. Once again, to check that Winrar has succesfully installed, go to C:/ProgramFiles/Winrar and then locate "WINRAR.EXE" - it should have the icon of a book.
 Step3: PORTFOWARDING YOUR ROUTER (OPTIONAL)
 (Note: Steps 3 and 4 are completely optional. Only follow these steps if you want your server to be online on other computers, so you can play with friends).
Before following the below steps, you will need to find out how to portfoward your router. It's simple, however, the process varies for nearly everyone depending on your router. Your best bet is to go on to Google and look up tutorials.
Step3: OBTAINING AN IP ADDRESS FOR YOUR PRIVATE SERVER (OPTIONAL) Before starting this step, make sure you have portfowarded your router.
Now,
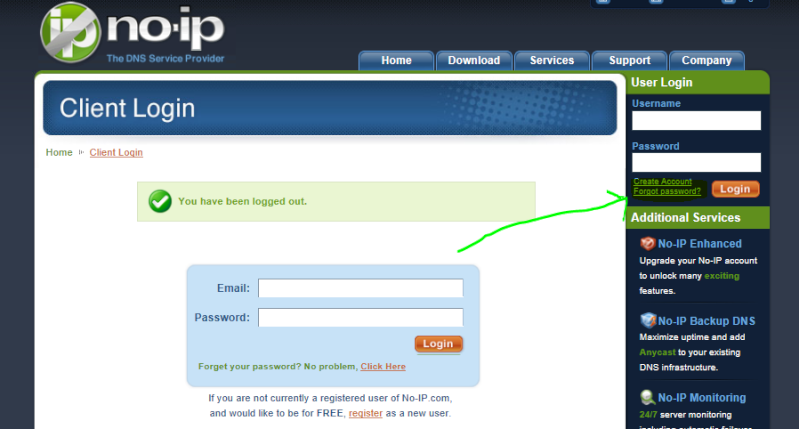
click here to visit "No-Ip", which will allow you to obtain a server IP address - basically, it's an address which allows you to put your server online for everyone to play.
Once you're on the homepage, click "Client login" and then click "Create account" below where you login. Alternatively, click
here for a direct link.
You will now be now brought to a page like this:
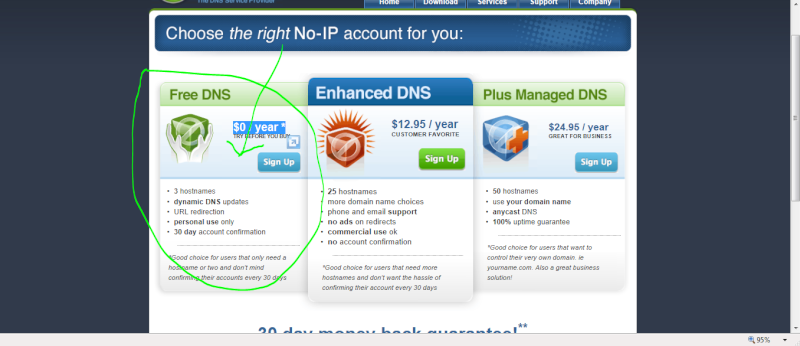
Now select "FREE DNS".
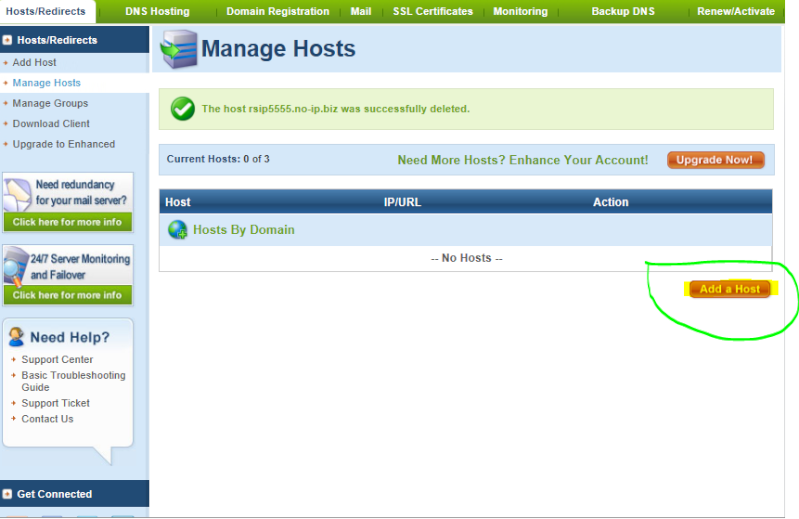
Once you have created your account, head to "Your No-Ip" and click "Manage Hosts" on the far right. Now, select "Add a Host".
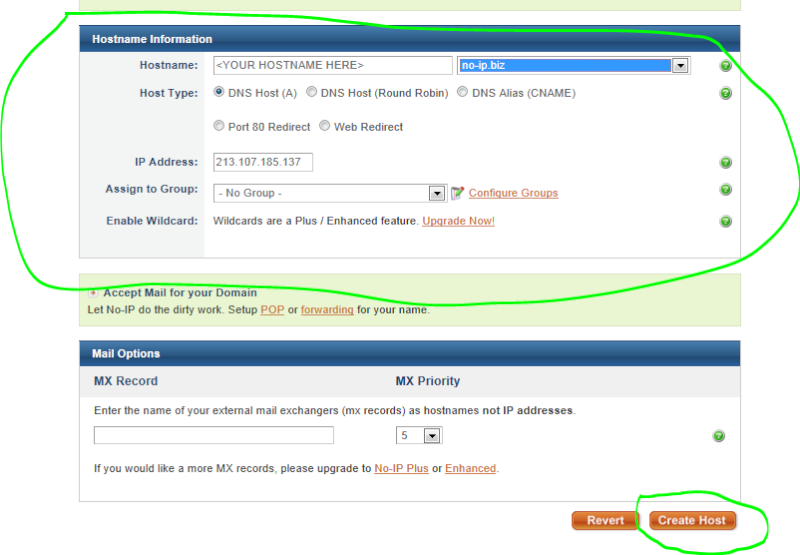
You can now customise your host. You want to be using "No-Ip.biz" or "No-Ip.net" - nothing else. Make sure your page looks exactly like mine, just replace the "INSERT HOSTNAME HERE" with your own hostname:
 STEP5:
 SETTING YOUR ENVIRONMENTAL VARIABLES
Setting your "Environmental variables" will tell your server where to locate and run Java. There are two ways of doing it: The complicated way, and the mega-easy way. Let's take the mega-easy way!
First, you will need to download some software called "Variable setter" by
clicking here.
Click "I accept" and then scroll down the thread to find "Download". Now, click "Run" or "Save". You [b]MUST right click "Run as administrator" otherwise it will not work.
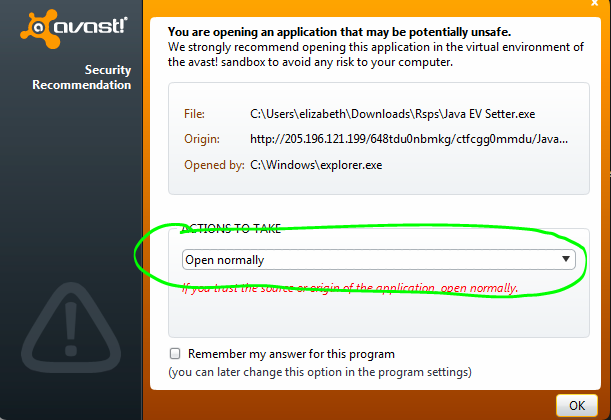
If you get this message, click "Open normally". Don't be alarmed if you see this message - this software is created and run by Java, and Avast doesn't always understand .Exe files.
Once, your EV setter is open, it should look like this:

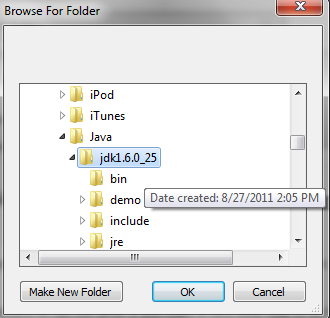
Ignore the settings labelled "Path" and "New", all you need to do now is click "search" and locate your JDK folder in C:/ProgramFiles/Java and select the same folder as I do:
 Step6:
 Obtaining a source and client
Now, you may be thinking: what an earth is a source or client? Well, a source is a folder that contains all the code needed for your server. A client, on the other hand, is basically the motor that drives all that code in to server. Think of it simply as a coal power station: The coal is the source, while the blast furnace, which is the client, burns the coal to power the turbine, which is the whole server.
Downloads for the very best sources and clients are available here:
http://www.runebit.com/index.php?/topic/19-list-of-exceptional-sources/You want to be, however, only downloading "Hyperion". Apollo, unfortunately, is one of the most bugged servers out there, and has a source and client that is not well written.
Alternatively, my personal favourite, "Deltascape" source and client can be downloaded by
clicking here.
Either way, double click on the file links and click "open".
You will now be redirected to winrar.
(Please note that not all folders look like this)
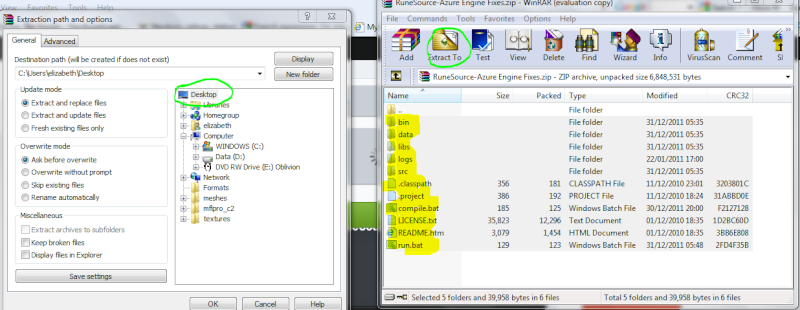
Highlight all files except "..." and then click "Extract to" and click your preferred file location while your folders will be put - preferably somewhere you can remember like the desktop. Do this for both the source and client.
Step7: RUNNING YOUR SERVER Congratulations, your almost there - not far to go now!
Now, go in to your "source" folder and find a file named "Run" with a file extension called "WINDOWS BATCH FILE" - double click it, and leave it open. If you downloaded deltascape, it will look like this:

Now, time to run your client. Go in to your "Client" folder and find a file called "Runserver" also with a "Windows batch file" file extension. Now double click it. REMEMBER TO KEEP YOUR "Run" FILE OPEN BEFORE CLICKING THIS!!
Another black box will open saying "Press any key to continue" - if so, congratulations, you have succesfully opened your server!
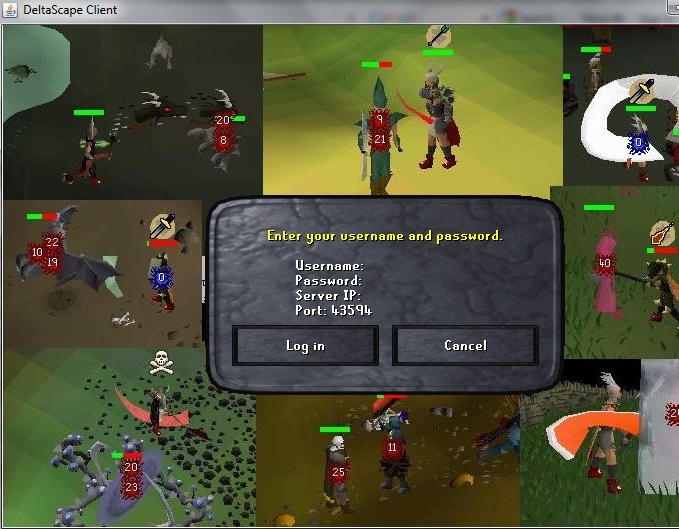
Your server will now run. You should now have a screen similar to mine. Enter any username you wish in to the "Username" section and any password you wish in to the "Password" section. You can leave the "Server IP" section blank (Not all servers allow this - if so, enter "127.0.0.1") or enter your No-Ip address you created earlier!
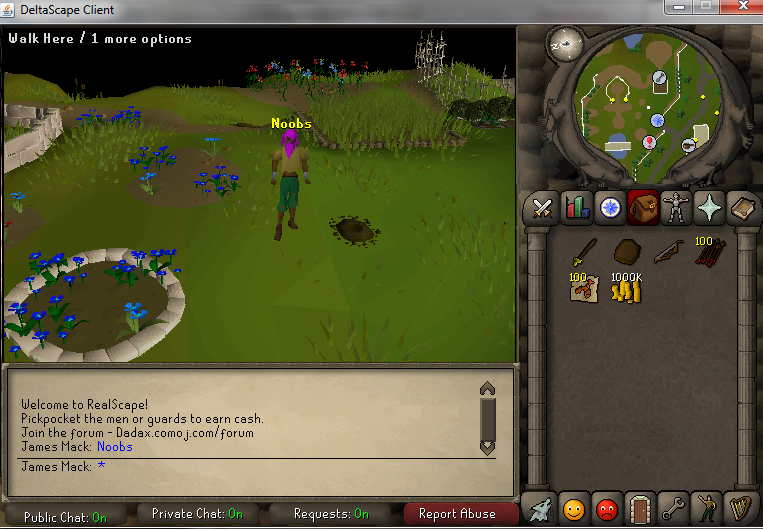
Congratulations! You now have your very own private server!
I hope you enjoyed my tutorial, please leave feedback below. Thanks again! And, please don't hesitate check out my "Private Server tricks" tutorial below!
Runescape Private server tricks guide!James Mack
I want to enter GOTM #1